Photeeq Bokeh is a photography technique that creates a pleasing out-of-focus background. It enhances subject isolation and visual appeal.
Photeeq Bokeh, originating from the Japanese word “boke,” refers to the aesthetic quality of the blur produced in out-of-focus parts of an image. Photographers often use it to draw attention to the subject by creating a creamy, smooth background. Achieving this effect requires a fast lens with a wide aperture, typically f/1.
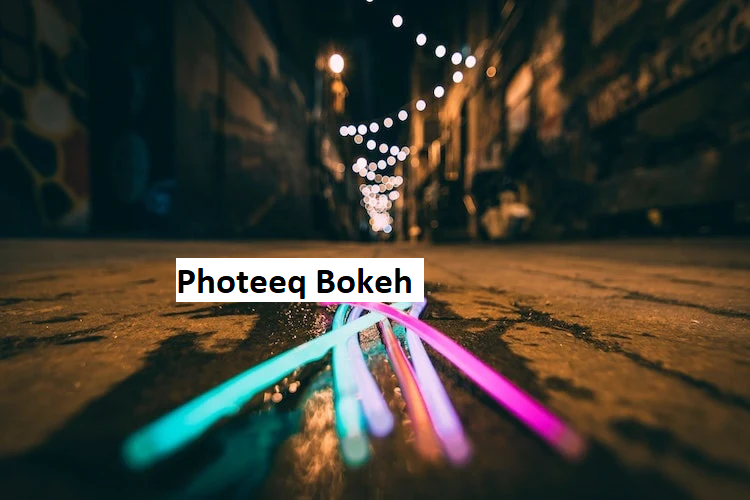
4 to f/2. 8. This technique is popular in portrait and macro photography, where subject isolation is crucial. Quality bokeh enhances the overall image appeal, making the subject stand out sharply against a beautifully blurred background. Mastering Photeeq Bokeh involves understanding lens properties and practicing with different settings to perfect the desired effect.
Photeeq Bokeh Magic
The world of photography is filled with wonders. One of these wonders is Photeeq Bokeh Magic. This technique can transform ordinary photos into extraordinary pieces of art. It emphasizes the subject while blurring the background beautifully.
Art Of Background Blur
Background blur is a key element in photography. It helps to separate the subject from the background. Bokeh is the quality of this blur. Photeeq Bokeh Magic enhances this blur to create stunning effects. The art of background blur involves using specific settings and lenses. With Photeeq Bokeh, you can achieve this with ease. The result is a smooth, dreamy background. This helps to highlight the main subject effectively.
Creating Visual Impact
Creating visual impact in photos is crucial. Photeeq Bokeh Magic helps achieve this by focusing on the subject. The blurred background removes distractions. This directs the viewer’s attention to the subject. Here are some ways Photeeq Bokeh creates visual impact:
- Highlights the subject by blurring the background.
- Adds depth to the photo.
- Creates a professional look effortlessly.
- Enhances colors and lights in the background blur.
Using Photeeq Bokeh can make your photos stand out. It is a simple yet powerful tool for photographers.
Understanding Bokeh
Bokeh is a popular photography effect. It makes photos look dreamy. Photeeq Bokeh helps you achieve this effect easily. Understanding bokeh is crucial for photographers. This section explains what bokeh is and its types.
What Is Bokeh?
Bokeh is a Japanese word. It means “blur” or “haze.” In photography, bokeh refers to the quality of the out-of-focus areas. This usually happens in the background of an image. Bokeh makes the subject stand out more. Photographers love bokeh for its artistic touch. It creates a sense of depth. Bokeh can be soft and smooth or harsh and edgy. The lens and aperture settings affect bokeh quality.
Types Of Bokeh
There are two main types of bokeh: good bokeh and bad bokeh. Good bokeh enhances the photo. Bad bokeh distracts from the main subject.
| Type | Description |
|---|---|
| Good Bokeh | Smooth and creamy. Enhances the subject. |
| Bad Bokeh | Harsh and distracting. Takes attention away. |
Good bokeh has several sub-types:
- Soft Bokeh: Smooth transitions. Looks very pleasing.
- Soap Bubble Bokeh: Circular highlights. Adds a magical touch.
- Swirly Bokeh: Circular patterns. Creates a unique effect.
Bad bokeh also has a few forms:
- Busy Bokeh: Too many details. Distracts the viewer.
- Double-line Bokeh: Unpleasant outlines. Looks messy.
Photeeq Bokeh Features
Photeeq Bokeh transforms your photos with stunning effects. Explore its features to enhance your photography skills.
Advanced Algorithms
Photeeq Bokeh uses advanced algorithms for perfect bokeh effects. These algorithms ensure your photos look professional and artistic. The algorithms intelligently detect and blur backgrounds. This brings your subject into sharp focus.
- Smart detection of background elements
- Precision blurring techniques
- Seamless integration with photo editing tools
Customizable Settings
Photeeq Bokeh offers highly customizable settings. Tailor the bokeh effect to suit your creative vision. Adjust the intensity and shape of the bokeh easily. You can also fine-tune the light points for the perfect look.
| Setting | Description |
|---|---|
| Intensity | Control the strength of the bokeh effect |
| Shape | Choose from various bokeh shapes |
| Light Points | Adjust the size and brightness of light points |
Experiment with different settings for unique results. Each photo can have a different look and feel.
Mastering Bokeh Techniques
Mastering bokeh techniques can transform your photos from ordinary to extraordinary. Bokeh refers to the beautiful blur created in the out-of-focus areas of an image. This technique makes your subject pop and adds a dreamy effect to your photos. Let’s dive into the essentials of mastering bokeh.
Lens Selection
Choosing the right lens is crucial for achieving stunning bokeh. Prime lenses are generally preferred for this purpose. They have wider apertures and better optical quality. A 50mm f/1.8 lens is an excellent starting point for beginners. It offers a good balance between price and performance. Telephoto lenses, such as an 85mm f/1.4, can also create exceptional bokeh. These lenses compress the background, making the blur more pronounced. Below is a table that lists some popular lenses ideal for bokeh:
| Lens | Aperture |
|---|---|
| 50mm | f/1.8 |
| 85mm | f/1.4 |
| 35mm | f/1.4 |
Aperture Settings
Aperture settings play a vital role in creating bokeh. A wider aperture (smaller f-number) produces a shallower depth of field. This means only a small part of the image is in focus, while the rest is blurred. For example, setting your aperture to f/1.4 or f/2.8 can create a stunning bokeh effect. Remember, the wider the aperture, the more pronounced the bokeh. Use the following steps to adjust your aperture settings:
- Switch your camera to Aperture Priority mode.
- Rotate the dial to set a wide aperture (e.g., f/1.4).
- Focus on your subject to create the blur effect.
Experiment with different aperture settings to see what works best for your scene. Take multiple shots and compare them to find the perfect balance.
Photeeq User Guide
Welcome to the Photeeq User Guide. This guide helps you understand Photeeq Bokeh. It covers installation, user interface, and more.
Installation Process
Installing Photeeq Bokeh is easy. Follow these steps:
- Download the Photeeq Bokeh software from the official website.
- Open the downloaded file to start the installation.
- Follow the on-screen instructions to complete the setup.
- Launch the software once installation is complete.
Ensure your system meets the following requirements:
| Requirement | Specification |
|---|---|
| Operating System | Windows 10 or macOS 10.13+ |
| RAM | 4 GB minimum |
| Disk Space | 500 MB free space |
User Interface Walkthrough
The Photeeq Bokeh interface is user-friendly. Here’s a quick tour:
- Toolbar: Located at the top. It has essential tools and options.
- Side Panel: Found on the right. It contains settings and adjustments.
- Preview Area: The central part. Displays your photos and edits.
- Bottom Bar: Shows the status and quick actions.
Each tool in the toolbar has a specific function. Hover over icons for tooltips. The side panel offers sliders for fine-tuning your photos. Use the preview area to see changes in real-time. With this guide, you can start using Photeeq Bokeh confidently. Enjoy editing your photos with ease!
Tips For Stunning Bokeh
Creating stunning bokeh with Photeeq Bokeh can elevate your photos. Bokeh refers to the pleasing blur effect in the out-of-focus areas of an image. Here are some tips to help you achieve the best bokeh.
Lighting Tips
Good lighting is crucial for beautiful bokeh. Use natural light or soft artificial light to illuminate your subject.
- Soft light reduces harsh shadows and enhances the bokeh effect.
- Backlighting can create a magical glow around your subject.
- Low light conditions can make the bokeh more pronounced.
Avoid direct sunlight as it can be too harsh. Use reflectors or diffusers to soften the light. Balance the lighting to highlight the subject without overpowering the bokeh.
Subject Placement
Where you place your subject affects the bokeh quality. Keep these tips in mind:
- Place the subject far from the background.
- Use a wide aperture (small f-number).
- Ensure the background has some light sources.
A greater distance between the subject and background enhances the blur. A wide aperture helps to isolate the subject. Light sources in the background create beautiful bokeh shapes. Experiment with different distances and apertures. Adjust until you find the perfect balance. Remember, practice makes perfect. Keep trying new techniques to master the art of bokeh with Photeeq Bokeh.
Common Mistakes
Avoiding Overblurring
Overblurring is a frequent issue with Photeeq Bokeh. Too much blur can make your photo look unnatural. Follow these tips to avoid overblurring:- Adjust the blur level to match the scene.
- Use less blur for close-up shots.
- Check the edges for smooth transitions.
Maintaining Subject Sharpness
Keeping the subject sharp is crucial. A blurry subject can ruin your photo. Here’s how to maintain subject sharpness:- Focus on the subject before applying bokeh.
- Use a higher aperture for more control.
- Keep the subject in a well-lit area.
Showcasing Your Work
Using Photeeq Bokeh can transform your photos into stunning visual art. It’s essential to showcase your work effectively. This helps you attract potential clients and gain recognition. Below are some strategies to display your photos.
Social Media Sharing
Social media platforms are powerful tools for sharing your work. Use Instagram, Facebook, and Pinterest to reach a broad audience. Here are some tips to make your photos stand out:
- High-Quality Images: Always upload high-resolution photos.
- Consistent Style: Maintain a consistent theme or color palette.
- Engaging Captions: Write captions that tell a story about the photo.
- Hashtags: Use relevant hashtags to increase visibility.
Engage with your audience by responding to comments and messages. This builds a community around your work.
Portfolio Building
A strong portfolio is crucial for any photographer. It showcases your skills and style. Here’s how you can build an impressive portfolio:
| Tips | Description |
|---|---|
| Variety | Include a range of subjects and styles. |
| Quality Over Quantity | Choose your best work rather than a large number of photos. |
| Regular Updates | Keep your portfolio current with recent work. |
| Professional Layout | Use clean and easy-to-navigate designs. |
Consider creating an online portfolio using platforms like Behance or your personal website. This gives potential clients easy access to your work.
Frequently Asked Questions
What Is Photeeq Bokeh?
Photeeq Bokeh is a photography technique that creates a pleasing blur in the background of images. It emphasizes the subject by blurring out the background, making the subject stand out more prominently.
How To Achieve Photeeq Bokeh Effect?
To achieve the Photeeq Bokeh effect, use a fast lens with a wide aperture. Position the subject far from the background. Adjust your camera settings to a low f-stop number.
Why Use Photeeq Bokeh In Photography?
Using Photeeq Bokeh in photography helps to isolate the subject and enhance its appeal. It adds depth and artistic flair to your photos. This technique is popular in portrait and macro photography.
What Lenses Are Best For Photeeq Bokeh?
Prime lenses with a wide aperture, like f/1. 4 or f/1. 8, are best for Photeeq Bokeh. These lenses allow more light in and create a softer, more aesthetic background blur.
Conclusion
Photeeq Bokeh transforms your photos with stunning depth and aesthetic appeal. This tool is user-friendly and versatile. Enhance your photography effortlessly and make your images stand out. Start experimenting with Photeeq Bokeh today and experience the difference it brings to your visual storytelling.
Your perfect shot is just a click away.